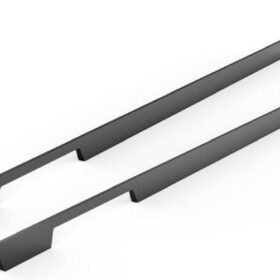
How to Properly Install Kitchen Cabinet Pull Handles
Installing kitchen cabinet pull handles is a seemingly simple task, but it requires precision and attention to detail to achieve a professional-looking result. This comprehensive guide will provide you with step-by-step instructions and tips to ensure a successful installation.
Tools and Materials
– New pull handles
– Measuring tape or ruler
– Pencil or marking tool
– Drill or screwdriver
– Screws
– Level
Preparation
– Determine Placement: Mark the center point where each pull handle will be installed on the cabinet door or drawer. Use a measuring tape or ruler to measure the distance from the top and sides of the cabinet and mark it accordingly.
– Check Alignment: Ensure that the pull handles are aligned horizontally and vertically. Use a level or straightedge to verify their position before drilling.
– Drill Pilot Holes (Optional): For hard materials like wood, drilling pilot holes slightly smaller than the screw size can prevent splitting or excess torque. This step is recommended for secure installations.
Installation
– Insert Screws: Align the pull handle with the pre-marked center point. Insert the screws through the holes in the handle and into the cabinet door or drawer.
– Tighten Screws: Use a drill or screwdriver to tighten the screws until snug. Avoid overtightening as this can damage the material or pull handle.
– Adjust Handle: If necessary, adjust the pull handle to ensure it sits flush against the cabinet surface and operates smoothly. Use a flathead screwdriver or wrench for minor adjustments.
Troubleshooting
– Misaligned Pull Handles: If the pull handles are not aligned properly, remove the screws and reposition the handle. Use a level or straightedge to verify alignment before reinstalling.
– Loose Screws: If the screws become loose over time, tighten them using a screwdriver or drill. Applying a small amount of threadlocker can prevent loosening.
– Broken Hardware: In the event of broken screws or pull handles, consult a hardware professional for repair or replacement.
Additional Tips
– Choose the Right Handle: Select pull handles that complement the style and finish of your kitchen cabinets. Consider the size, shape, and material to ensure a harmonious aesthetic.
– Match Screws to Handle: Use screws that are the appropriate length and thickness for the thickness of your cabinet doors or drawers.
– Use a Template (Optional): A template can assist with accurate placement and alignment of multiple pull handles. Create a template by marking the hole spacing and center point on a piece of cardboard or thin plywood.
– Flush Fit: Ensure the pull handle sits flush against the cabinet surface for a clean and professional look.
– Maintenance: Clean the pull handles regularly using a mild cleaning solution to maintain their appearance and prevent dirt buildup.
-
2024-11-29Top Trends in Modern Kitchen Cabinet Pulls for 2024
-
2024-11-28The Ultimate Guide to Modern Kitchen Cabinet Pulls- Materials, Styles, and Tips
-
2024-11-27Elevate Your Kitchen Design with These Must-Have Modern Cabinet Pulls
-
2024-11-26Sleek and Stylish- The Best Modern Kitchen Cabinet Pulls for a Contemporary Look


