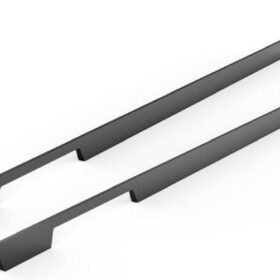
Step-by-Step Installation Guide for Profile Cabinet Handles
Introduction
Elevate the aesthetics and functionality of your kitchen or bathroom with the addition of sleek and sophisticated profile cabinet handles. Our comprehensive installation guide will guide you through the process seamlessly, ensuring a secure and professional finish.
Materials and Tools Required
– Profile cabinet handles
– Screwdriver
– Measuring tape
– Pencil or marking tool
– Level
– Drill (if necessary)
Step 1: Measure and Mark the Handle Placement
– Determine the desired handle placement based on cabinet size and personal preference.
– Measure the spacing between the handle holes on each handle and divide it in half.
– Measure from the top edge of the cabinet and mark the center point with a pencil or marker.
– Repeat this process for the other side of the cabinet.
Step 2: Drill Pilot Holes (if Required)
– Some handles may require pilot holes for secure installation.
– Use a drill bit slightly smaller than the screw diameter and drill a pilot hole at each marked center point.
– Ensure the drill is held perpendicular to the cabinet surface.
Step 3: Align and Secure the Handles
– Line up the handle with the pilot holes or mark the handle placement against the cabinet.
– Use the screwdriver to drive the screws through the holes and into the cabinet.
– Tighten the screws firmly, ensuring the handle is secure without being overtightened.
Step 4: Level the Handles
– Use a level to ensure the handles are aligned horizontally.
– If necessary, adjust the screws slightly to level the handles.
– Re-tighten the screws after any adjustments.
Step 5: Final Inspection
– Inspect the handles to ensure they are securely installed and properly aligned.
– Check that the screws are tight but not overtightened.
– Wipe away any fingerprints or marks on the handles for a polished finish.
Tips for a Professional Installation
– Use a measuring tape or ruler for precise measurements to avoid misalignments.
– Consider the cabinet’s size and style when selecting handle placement.
– If installing multiple handles, use a jig or template to ensure uniform spacing.
– Tighten the screws gradually to prevent stripping or damaging the cabinet.
– Use a slightly damp cloth to clean the handles after installation to remove any residue.
-
2024-11-29Top Trends in Modern Kitchen Cabinet Pulls for 2024
-
2024-11-28The Ultimate Guide to Modern Kitchen Cabinet Pulls- Materials, Styles, and Tips
-
2024-11-27Elevate Your Kitchen Design with These Must-Have Modern Cabinet Pulls
-
2024-11-26Sleek and Stylish- The Best Modern Kitchen Cabinet Pulls for a Contemporary Look


