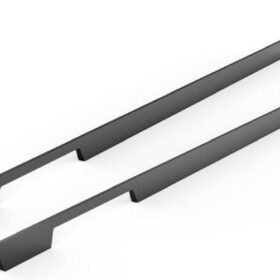
Step-by-Step Guide to Installing Heavy-Duty Friction Stays
Heavy-Duty Friction Stays Installation Guide: A Comprehensive Step-by-Step Approach
In the realm of window hardware, heavy-duty friction stays serve as indispensable components, ensuring optimal ventilation and safety. For those seeking to enhance the functionality and durability of their windows, a step-by-step guide to their installation is essential. Below, we delve into a comprehensive walkthrough, empowering DIY enthusiasts and professionals alike to achieve a flawless installation.
Step 1: Gather Tools and Materials
Before embarking on the installation process, it is crucial to assemble the necessary tools and materials. These include:
– Heavy-duty friction stays
– Drill
– Drill bits (appropriate for the screw size)
– Screwdriver
– Measuring tape
– Level
– Pencil or marker
– Safety glasses and gloves
Step 2: Assess Window and Frame
Prior to mounting the friction stays, carefully inspect the window and frame to determine the most suitable mounting locations. Ensure the window frame is sturdy enough to support the weight of the friction stays and the window when it is fully extended. Mark the drilling points using a pencil or marker.
Step 3: Drill Pilot Holes
Using a drill bit appropriate for the screw size, carefully drill pilot holes at the marked points on the window frame. These pilot holes should be slightly smaller than the screw diameter to ensure a secure fit. Consult the manufacturer’s instructions for specific drilling depth recommendations.
Step 4: Mount the Stay Base
Align the friction stay base with the pilot holes and secure it using the provided screws. Drive the screws firmly into the holes using a screwdriver, being cautious not to overtighten. Ensure the stay base is securely attached to the window frame.
Step 5: Install the Arm
Extend the friction stay arm to its full length. Position the arm and align it with the corresponding mounting point on the window. Mark the drilling points and repeat steps 3 and 4 to mount the arm to the window. Tighten the screws securely.
Step 6: Adjust Tension
Once the friction stay is fully installed, adjust the tension to regulate the resistance when opening or closing the window. Locate the tension adjustment screw or lever and turn it clockwise to increase tension and counterclockwise to decrease tension. Test the window’s operation to achieve the desired balance between ease of movement and secure hold.
Step 7: Safety Considerations
Always wear safety glasses and gloves when drilling or working with sharp objects. Keep the work area clean and free of debris. If you encounter any difficulties or have any doubts during the installation process, seek professional assistance to prevent any potential hazards.
Conclusion
Adhering to this step-by-step guide, you can confidently install heavy-duty friction stays, enhancing the functionality and safety of your windows. Remember to follow the safety precautions, use the correct tools and materials, and adjust the tension appropriately. With careful execution, you can achieve a secure and reliable installation, ensuring years of trouble-free window operation.
-
2024-11-29Top Trends in Modern Kitchen Cabinet Pulls for 2024
-
2024-11-28The Ultimate Guide to Modern Kitchen Cabinet Pulls- Materials, Styles, and Tips
-
2024-11-27Elevate Your Kitchen Design with These Must-Have Modern Cabinet Pulls
-
2024-11-26Sleek and Stylish- The Best Modern Kitchen Cabinet Pulls for a Contemporary Look


