Installing Kitchen Cabinet Edge Pulls on Different Types of Cabinets
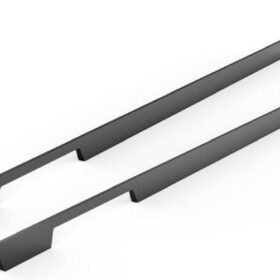
Edge pulls have become increasingly popular in kitchen design, offering a modern and sleek look to cabinets. They come in a variety of styles and finishes, making them suitable for any kitchen aesthetic. Installing kitchen cabinet edge pulls is a relatively simple DIY project that can be completed in a few hours. However, certain techniques and considerations must be taken when installing edge pulls on different types of cabinets.
Materials and Tools Required
Edge pulls
Screws or bolts
Drill/driver
Screwdriver
Measuring tape
Pencil or marker
Level
Measuring and Marking Cabinet
1. Measure the center point of the cabinet door and mark it with a pencil.
2. Use the measuring tape to determine the desired height of the edge pull. The standard height is 2-3 inches above the bottom of the door.
3. Mark the desired height on both sides of the center point.
4. Use a level to ensure that the marks are level across the door.
Drilling Pilot Holes
1. For frameless cabinets: Drill pilot holes at the marked locations using a drill bit slightly smaller than the screw or bolt size.
2. For framed cabinets: Drill pilot holes through the cabinet door and into the face frame.
Installing Edge Pulls
1. Insert the screws or bolts through the edge pull and into the pilot holes.
2. Tighten the screws or bolts until the edge pull is securely attached.
3. Check that the edge pull is level and centered using the level.
4. Repeat the process for all remaining edge pulls.
Edge Pulls for Frameless Cabinets
Edge pulls for frameless cabinets are typically mounted directly to the door. The installation process involves drilling pilot holes and screwing or bolting the edge pulls into the door. It is important to ensure that the edge pulls are aligned parallel to the cabinet edge and are level to create a clean and cohesive look.
Edge Pulls for Framed Cabinets
Framed cabinets have a face frame surrounding the door, requiring a different installation approach. Edge pulls for framed cabinets are mounted on the face frame, with the screws or bolts passing through the door and into the face frame. This type of installation requires precision to ensure that the edge pulls are positioned correctly and do not interfere with the opening and closing of the cabinet doors.
Tightening Screws
When tightening the screws, it is crucial to avoid overtightening, which can damage the cabinet material or the edge pull itself. Use a screwdriver and apply even pressure until the screws are snug. Additionally, check that the screws are not too loose, as this can result in the edge pulls becoming loose and rattling over time.
Aligner Tools
For precise alignment of edge pulls, especially when installing multiple pulls on a single cabinet door, aligner tools can be utilized. These tools help maintain consistent spacing and ensure that the edge pulls are level and parallel to each other. Aligner tools are particularly beneficial for larger cabinet doors where precision is essential.
-
2024-11-29Top Trends in Modern Kitchen Cabinet Pulls for 2024
-
2024-11-28The Ultimate Guide to Modern Kitchen Cabinet Pulls- Materials, Styles, and Tips
-
2024-11-27Elevate Your Kitchen Design with These Must-Have Modern Cabinet Pulls
-
2024-11-26Sleek and Stylish- The Best Modern Kitchen Cabinet Pulls for a Contemporary Look


