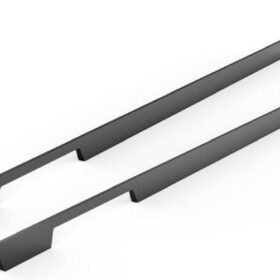
Installing G Profile Handles- Step-by-Step Guide
Installing G Profile Handles: A Comprehensive Guide
Introducing the comprehensive “Installing G Profile Handles: Step-by-Step Guide,” an in-depth resource that will guide you effortlessly through the process of installing G Profile handles. Whether you’re a seasoned professional or a DIY enthusiast, this article has meticulously detailed instructions that will help you achieve a successful installation.
Tools and Materials
Before embarking on your installation journey, ensure you gather the necessary tools and materials. This includes a Phillips head screwdriver, an Allen wrench (if required), and a pencil or marking tool. For your G Profile handles, you will also need the appropriate mounting hardware and a hole saw or drill bit to create the mounting holes.
Preparation
Prior to mounting your G Profile handles, it is crucial to prepare the surfaces by thoroughly cleaning them and ensuring they are free of any debris or dirt. This step will ensure a secure and long-lasting bond. Additionally, determine the exact placement of your handles by measuring and marking the desired locations.
Installation Process
1. Drilling the Pilot Holes
Using the marked locations as a guide, use a hole saw or drill bit to create the pilot holes for the mounting screws. The pilot holes should be slightly smaller in diameter than the screws used to secure the handles. Drill the holes to the appropriate depth for the screws to be flush with the surface.
2. Inserting the Mounting Screws
After drilling the pilot holes, insert the provided mounting screws into the holes and turn them clockwise using a Phillips head screwdriver. Ensure the screws are tightened snugly but avoid overtightening.
3. Sliding on the Handles
With the mounting screws in place, carefully slide the G Profile handles over the screws. Align the handles correctly and ensure they are seated properly on the mounting brackets.
4. Tightening the Allen Screws (if applicable)
Some G Profile handles feature Allen screws that require tightening after sliding the handles into place. Using an Allen wrench, tighten the Allen screws securely to ensure the handles are firmly attached.
Inspection and Maintenance
Once the handles are installed, inspect them carefully to ensure they are secure and functioning properly. If any adjustments are needed, make them promptly. Regularly clean and maintain your G Profile handles by wiping them down with a damp cloth. Avoid using harsh chemicals or abrasive cleaners that could damage the handles or their finish.
Conclusion
Installing G Profile handles can be a straightforward and rewarding task with the appropriate preparation and tools. By following this step-by-step guide diligently, you can achieve a professional-looking installation that will enhance the functionality and aesthetics of your cabinetry or furniture. Remember to adhere to safety precautions and refer to the manufacturer’s instructions for specific guidelines regarding your particular G Profile handles.
-
2024-11-29Top Trends in Modern Kitchen Cabinet Pulls for 2024
-
2024-11-28The Ultimate Guide to Modern Kitchen Cabinet Pulls- Materials, Styles, and Tips
-
2024-11-27Elevate Your Kitchen Design with These Must-Have Modern Cabinet Pulls
-
2024-11-26Sleek and Stylish- The Best Modern Kitchen Cabinet Pulls for a Contemporary Look


