Installing Edge Handle Profiles- Step-by-Step Guide
Installing Edge Handle Profiles: A Step-by-Step Guide to Unlock Precision
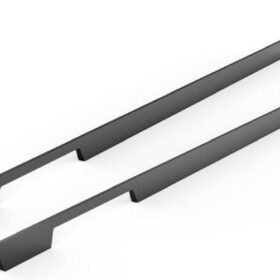
Are you ready to elevate your engineering prowess to new heights? Unleash the transformative potential of edge handle profiles and witness the precision they bring to your design and development endeavors. In this definitive guide, we meticulously guide you through the intricate process of installing edge handle profiles, empowering you to harness their unparalleled capabilities.
Step 1: Prepare the Stage
Before embarking on this journey, ensure your workspace is well-lit and equipped with the necessary tools. Gather your edge handle profile, a screwdriver, and a cutting tool. Meticulously clean the surface where the profile will reside, banishing any dust or debris that could hinder its flawless adhesion.
Step 2: Measure and Cut
Precise measurement is paramount. Use a measuring tape to determine the length of the edge where the profile will be installed. Mark the measurements on the profile using a pencil or pen. Now, employing your cutting tool, meticulously cut the profile to the specified length. Accuracy is key here, as any deviations will compromise the profile’s effectiveness.
Step 3: Apply Adhesive
Retrieve the high-quality adhesive that accompanies the edge handle profile. Carefully apply a thin, even layer of adhesive to the back of the profile. Ensure complete coverage to maximize its adherence to the surface.
Step 4: Position and Press
With the adhesive in place, carefully align the profile along the edge of your chosen surface. Apply firm pressure along its length, ensuring every inch is securely bonded. Use a rubber mallet or press to gently tap the profile into place. This step requires patience and precision to achieve optimal results.
Step 5: Trim and Clean
Once the profile is firmly secured, use a utility knife to trim any excess material that extends beyond the edge. This ensures a clean and professional finish. Wipe away any adhesive residue or debris with a damp cloth, leaving behind a pristine installation.
Step 6: Marvel at Precision
With the edge handle profile firmly installed, you now hold the key to unlocking precision. Embrace its unwavering accuracy, smoothness, and durability. Witness how it effortlessly guides your movements and enhances the overall functionality and aesthetics of your designs.
Additional Tips:
For optimal performance, choose a profile crafted from high-grade materials such as aluminum or stainless steel.
Utilize a spirit level to ensure perfect alignment during installation.
Allow ample drying time for the adhesive before putting the profile under any significant load.
Regularly clean and maintain the profile to preserve its pristine condition and extend its lifespan.
By following these steps, you have successfully installed edge handle profiles, transforming your designs with precision and elegance. They will serve as unwavering guides, elevating your creations to new heights of functionality and aesthetics. Embrace the transformative power of these profiles and unleash your engineering prowess.
-
2024-11-29Top Trends in Modern Kitchen Cabinet Pulls for 2024
-
2024-11-28The Ultimate Guide to Modern Kitchen Cabinet Pulls- Materials, Styles, and Tips
-
2024-11-27Elevate Your Kitchen Design with These Must-Have Modern Cabinet Pulls
-
2024-11-26Sleek and Stylish- The Best Modern Kitchen Cabinet Pulls for a Contemporary Look


