How to Properly Install Long Wardrobe Door Handles
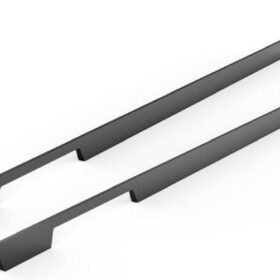
In the realm of interior design, the wardrobe door handle stands out as a subtle yet impactful element that can elevate the aesthetic of any space. When it comes to installing long wardrobe door handles, precision and attention to detail are paramount. From selecting the perfect handle to ensuring its proper alignment, this guide will provide you with a step-by-step walkthrough that will leave your wardrobe doors looking impeccably stylish.
Step 1: Choosing the Perfect Handle
An art form in itself, selecting the right long handle for your wardrobe is a crucial step. Consider factors such as the style of your wardrobe and the overall d2cor of your room. From sleek and modern designs to ornate and traditional styles, there’s a handle out there to complement every taste.
Step 2: Measuring and Marking
Precision is key when installing long wardrobe door handles. Using a tape measure, carefully determine the center point of the door. Mark this point lightly with a pencil. Measure the distance between the center point and the edge of the door, where the handle will be installed. Transfer this measurement to the other side of the door to ensure symmetrical placement.
Step 3: Drilling Pilot Holes
Before you screw in the handles, it’s essential to drill pilot holes. These holes will guide the screws, preventing the wood from splitting or the handles from becoming loose. Use a drill bit that is slightly smaller than the diameter of the screws you will be using.
Step 4: Mounting the Handles
With the pilot holes in place, carefully insert the screws through the base of the handle. Tighten the screws until the handle is firmly secured to the door. Be sure not to overtighten, as this can damage the wood.
Step 5: Aligning the Handles
Once both handles are installed, it’s time to check their alignment. Open and close the door to ensure that the handles are perfectly aligned horizontally and vertically. If any adjustments are needed, loosen the screws slightly and reposition the handles accordingly.
Step 6: Final Tightening
Once you’re satisfied with the alignment, fully tighten the screws until the handles are secure. Use a screwdriver with a magnetic tip to hold the screws in place during tightening.
Installing long wardrobe door handles may seem like a trivial task, but following these steps carefully will ensure a professional-looking finish. By choosing the perfect handles, measuring and marking accurately, drilling pilot holes, mounting the handles securely, and aligning them precisely, you can elevate the style of your wardrobe while adding a touch of functionality. Remember, it’s the attention to detail that makes all the difference in creating a cohesive and aesthetically pleasing space.
-
2024-11-29Top Trends in Modern Kitchen Cabinet Pulls for 2024
-
2024-11-28The Ultimate Guide to Modern Kitchen Cabinet Pulls- Materials, Styles, and Tips
-
2024-11-27Elevate Your Kitchen Design with These Must-Have Modern Cabinet Pulls
-
2024-11-26Sleek and Stylish- The Best Modern Kitchen Cabinet Pulls for a Contemporary Look


