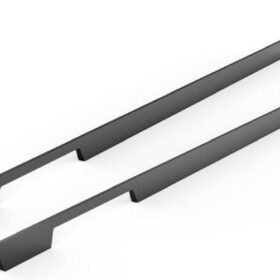
DIY Tips for Installing Kitchen Cabinet Pull Handles
Installing kitchen cabinet pull handles is a relatively straightforward task that can be completed in a few hours with the right tools and materials. Whether you’re a seasoned DIYer or a novice, following these tips can ensure a professional-looking finish to your kitchen cabinets.
Tools and Materials You’ll Need
– Drill
– Measuring tape
– Pencil or marking tool
– Screwdriver
– Pull handles
– Mounting screws (usually included with the handles)
Step 1: Determine Handle Placement
The first step is to determine the optimal placement of your pull handles. Measure the length of your cabinets and mark the center point. Use a measuring tape to measure the distance from the top or bottom edge of the cabinet to the center point. This distance should be consistent throughout all cabinets.
Step 2: Drill Pilot Holes
Once you’ve marked the placement, use a drill to create pilot holes for the mounting screws. Use a drill bit that is slightly smaller than the diameter of the screw. Drill the holes perpendicular to the cabinet surface, ensuring that they are deep enough to accommodate the length of the screw.
Step 3: Attach the Pull Handles
Align the pull handles over the pilot holes and insert the mounting screws. Tighten the screws using a screwdriver until the handles are securely attached to the cabinet. Ensure that the handles are parallel to the cabinet edges and that there is no wobbling or play.
Step 4: Install Screws from Inside the Cabinet
For a more professional-looking finish, consider installing the mounting screws from inside the cabinet. Remove the drawers or shelves below the cabinet where the screw holes are located. Use the same size drill bit to create counterbore holes from the inside of the cabinet.
Step 5: Insert Backing Plates
If your pull handles have backing plates, insert them into the counterbore holes. These backing plates provide additional support and reinforcement, preventing the screws from pulling through the cabinet material.
Step 6: Tighten Screws from the Inside
Align the pull handles over the backing plates and insert the mounting screws from the inside of the cabinet. Tighten the screws until the handles are secure.
Step 7: Clean and Inspect
Once all the pull handles are installed, clean any sawdust or debris from the cabinets. Inspect the handles to ensure they are securely attached and that there are no gaps or unevenness. Adjust the screws as necessary to achieve a perfect fit.
By following these DIY tips, you can easily install kitchen cabinet pull handles like a pro. With a little preparation and attention to detail, you can transform the look and functionality of your kitchen cabinets without breaking the bank.
-
2024-11-29Top Trends in Modern Kitchen Cabinet Pulls for 2024
-
2024-11-28The Ultimate Guide to Modern Kitchen Cabinet Pulls- Materials, Styles, and Tips
-
2024-11-27Elevate Your Kitchen Design with These Must-Have Modern Cabinet Pulls
-
2024-11-26Sleek and Stylish- The Best Modern Kitchen Cabinet Pulls for a Contemporary Look


