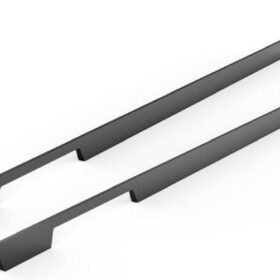
DIY Projects- Installing Aluminum Alloy Handles
Introduction
In the ever-evolving world of home improvement, DIY projects have become increasingly popular. One such project is the installation of aluminum alloy handles, a practical and stylish upgrade for any home. This comprehensive guide will provide detailed instructions on how to complete this project, empowering you to enhance the aesthetics and functionality of your home.
Materials and Tools
Aluminum alloy handles
Screwdriver or drill
Screws
Measuring tape
Pencil
Level
Preparation
1. Determine the Location:
Choose the desired locations for the handles. Consider the height and spacing that best suit your needs. Use a pencil to mark the drill points on the surface.
2. Measure and Mark:
Measure the center-to-center distance between the drill points. This measurement will determine the length of the screws you need. Use a level to ensure the marks are aligned horizontally.
Installation
1. Drill Pilot Holes:
Using a drill or screwdriver, create pilot holes at the marked locations. The pilot holes should be slightly smaller in diameter than the screws you will be using. This prevents the wood from splitting during insertion.
2. Insert Screws:
Align the aluminum alloy handles with the pilot holes and insert the screws. Use a screwdriver or drill to tighten the screws until the handles are securely fastened.
3. Position the Handles:
Slide the handles into the desired position and ensure they are level. Use a level to check the alignment and make any necessary adjustments.
4. Tighten the Screws:
Continue tightening the screws until the handles are firmly attached. Avoid overtightening, as this could damage the handles or the surface.
Finishing Touches
1. Clean the Handles:
Wipe down the aluminum alloy handles with a damp cloth to remove any dirt or debris. Use a non-abrasive cleaner to maintain the finish.
2. Enjoy the Upgrade:
Step back and admire your newly installed aluminum alloy handles. Appreciate the improved functionality and the stylish addition to your home decor.
Tips
Use matching screws to ensure a cohesive look.
Countersink the screws slightly to create a flush finish.
Apply a clear sealant to protect the handles from corrosion and wear.
Regularly clean the handles with a mild detergent to maintain their appearance.
-
2024-11-29Top Trends in Modern Kitchen Cabinet Pulls for 2024
-
2024-11-28The Ultimate Guide to Modern Kitchen Cabinet Pulls- Materials, Styles, and Tips
-
2024-11-27Elevate Your Kitchen Design with These Must-Have Modern Cabinet Pulls
-
2024-11-26Sleek and Stylish- The Best Modern Kitchen Cabinet Pulls for a Contemporary Look


