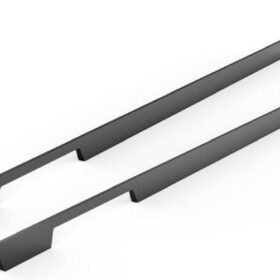
DIY Guide to Replacing Kitchen Bar Handles
DIY Guide to Replacing Kitchen Bar Handles: Unleash Your Kitchen’s Inner Potential
Transform your kitchen into a culinary haven with a simple yet impactful upgrade – replacing your bar handles. This quick and easy DIY project will not only enhance the aesthetics of your kitchen but also elevate its functionality.
Materials You’ll Need:
– New bar handles
– Screwdriver (Phillips or flathead)
– Pencil or measuring tape
– Level (optional)
Instructions:
1. Measure and Mark: Determine the placement of your new handles. Use a pencil or measuring tape to mark the exact location on the cabinet doors or drawers. Ensure that the handles are evenly spaced and at a comfortable height.
2. Remove Old Handles: Using a screwdriver, carefully unscrew the existing handles. If any screws are stuck, apply a small amount of penetrating oil. Be gentle as to not damage the cabinets.
3. Install New Handles: Align the new handles with the marked positions. Insert the screws and start tightening them by hand. Once snug, use a screwdriver to fully secure the handles.
4. Align and Level: If desired, use a level to ensure that the handles are installed straight and evenly. Adjust the screws as necessary to achieve perfect alignment.
5. Admire Your Masterpiece: Step back and admire your newly transformed kitchen. The updated bar handles will instantly refresh the look and feel of your space.
Tips:
– Choose handles that complement the style of your kitchen and cabinetry.
– Consider the size and shape of the handles to ensure a comfortable grip.
– Use a cordless screwdriver for ease and convenience.
– Clean the handles before installing them to remove any dirt or debris.
By following these simple steps, you can easily replace your kitchen bar handles and inject a touch of elegance and functionality into your cooking paradise. Let your culinary creations inspire you, and unleash the full potential of your kitchen with this quick and rewarding DIY project.
-
2024-11-29Top Trends in Modern Kitchen Cabinet Pulls for 2024
-
2024-11-28The Ultimate Guide to Modern Kitchen Cabinet Pulls- Materials, Styles, and Tips
-
2024-11-27Elevate Your Kitchen Design with These Must-Have Modern Cabinet Pulls
-
2024-11-26Sleek and Stylish- The Best Modern Kitchen Cabinet Pulls for a Contemporary Look


