A Step-by-Step Guide to Installing Wardrobe Door Pull Handles
A Comprehensive Guide to Installing Wardrobe Door Pull Handles
Introduction
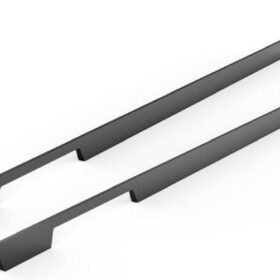
Wardrobe door pull handles are essential components that not only enhance the functionality of your wardrobe but also add a touch of style. Installing them correctly is crucial to ensure seamless operation and a polished look. A Step-by-Step Guide to Installing Wardrobe Door Pull Handles provides a comprehensive overview of the process, empowering you to complete the task like a pro.
Materials Required
1. Wardrobe door pull handles
2. Pencil or marking tool
3. Measuring tape
4. Screwdriver or drill
5. Screws
Step 1: Position the Handles
Measure the distance between the top and bottom of the wardrobe door and mark the center point. Use a measuring tape to determine the desired distance between the handles. Mark the locations on the door using a pencil.
Step 2: Drill Pilot Holes
At each marked location, drill a small pilot hole using a drill bit that is slightly smaller than the diameter of the handle screws. The pilot holes will help to guide the screws into place and prevent the wood from splitting.
Step 3: Insert the Handles
Insert the handles into the pilot holes and tighten the screws until snug. Avoid overtightening, as this can damage the handles or the wardrobe door.
Step 4: Check Alignment
Once the handles are installed, check their alignment by opening and closing the wardrobe door. The handles should be positioned so that they are easy to grip and do not obstruct the door’s movement.
Step 5: Adjust as Needed
If the handles are not perfectly aligned, use a screwdriver to loosen the screws slightly. Reposition the handles and tighten the screws again until they are secure and correctly aligned.
Step 6: Clean Up
Use a soft cloth to wipe away any pencil marks or debris. Inspect the handles to ensure that they are firmly attached and functioning properly.
Installing wardrobe door pull handles is a simple but important task that can enhance both the functionality and aesthetics of your wardrobe. By following these step-by-step instructions, you can ensure a seamless installation that will provide years of trouble-free use. Remember to take your time, measure carefully, and adjust as needed to achieve perfect results.
-
2024-11-29Top Trends in Modern Kitchen Cabinet Pulls for 2024
-
2024-11-28The Ultimate Guide to Modern Kitchen Cabinet Pulls- Materials, Styles, and Tips
-
2024-11-27Elevate Your Kitchen Design with These Must-Have Modern Cabinet Pulls
-
2024-11-26Sleek and Stylish- The Best Modern Kitchen Cabinet Pulls for a Contemporary Look


