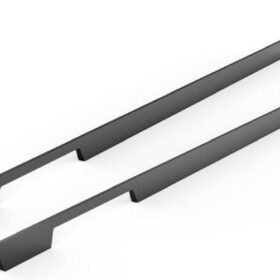
A Step-by-Step Guide to Installing Bedroom Wardrobe Handles
When it comes to refreshing the look of your bedroom, updating the wardrobe handles can make a significant impact. With a few simple steps and the right tools, you can easily transform your wardrobe from drab to fab in no time. This comprehensive guide will lead you through the entire process, ensuring a professional-looking finish.
1. Selecting the Right Handles
The first step is to choose handles that complement the style of your wardrobe and the overall design of your bedroom. Consider the shape, size, and material of the handles to achieve the desired aesthetic. Opt for handles that are comfortable to grip and easy to operate. Measure the distance between the existing screw holes and the center of the handle to ensure a snug fit.
2. Gathering the Tools
Before you begin, gather the necessary tools:
Screwdriver (Phillips or flathead depending on the screws)
Measuring tape or ruler
Pencil or marker
Level (optional)
Drill (for creating pilot holes if needed)
Screws
3. Removing the Old Handles
Locate the screws holding the old handles in place and carefully remove them using the appropriate screwdriver. If the screws are recessed, use a magnetic screwdriver for easier removal. Gently pull the old handles off the wardrobe doors.
4. Marking the Positions
Place the new handles against the wardrobe doors and mark the center point of each screw hole using a pencil or marker. If you want to ensure perfect alignment, use a level to check the horizontality of the handles.
5. Creating Pilot Holes
If the screws provided with the new handles are too large for the existing holes, you may need to create pilot holes to avoid splitting the wood. Use a drill with a bit slightly smaller than the screw diameter to make a small hole at each marked point.
6. Installing the New Handles
Align the new handles with the marked positions and insert the screws. Tighten the screws firmly using the screwdriver, ensuring they are secure but not overtightened.
7. Finishing Touches
Wipe down the handles and surrounding area to remove any debris or fingerprints. If any gaps appear between the handles and the wardrobe doors, use a small amount of adhesive or wood filler to fill them in.
8. Enjoy Your Updated Wardrobe
Step back and admire your newly updated wardrobe. The new handles should seamlessly blend into the design, enhancing the functionality and aesthetic appeal of your bedroom.
-
2024-11-29Top Trends in Modern Kitchen Cabinet Pulls for 2024
-
2024-11-28The Ultimate Guide to Modern Kitchen Cabinet Pulls- Materials, Styles, and Tips
-
2024-11-27Elevate Your Kitchen Design with These Must-Have Modern Cabinet Pulls
-
2024-11-26Sleek and Stylish- The Best Modern Kitchen Cabinet Pulls for a Contemporary Look


