Installing Gola Aluminum Profiles- A Step-by-Step Guide
Installing Gola Aluminum Profiles: A Comprehensive Guide
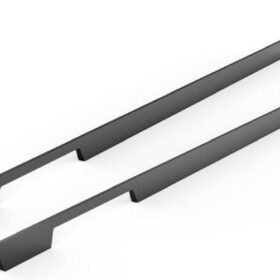
In the realm of interior design, aluminum profiles have gained immense popularity for their versatility, durability, and aesthetic appeal. Gola aluminum profiles, in particular, stand out for their sleek, handle-less design that seamlessly integrates with cabinetry and furniture. Installing Gola aluminum profiles requires meticulous attention to detail and a systematic approach. This comprehensive guide will provide a step-by-step process to ensure a professional and flawless installation.
Materials and Tools Required
Before embarking on the installation process, gather the necessary materials and tools: Gola aluminum profiles, mounting brackets, screws, a drill, a screwdriver, a level, and masking tape.
Step 1: Prepare the Cabinetry
Begin by marking the desired position of the Gola profile on the cabinetry using a level and pencil. Use masking tape to outline the area where the profile will be installed, protecting the surface from scratches.
Step 2: Install Mounting Brackets
Align the mounting brackets with the marked area and secure them to the cabinetry using screws. The spacing between the brackets depends on the length of the profile and the weight it will support. Ensure that the brackets are level and flush with the surface.
Step 3: Cut the Gola Profile
Measure and cut the Gola profile to the desired length using a saw or miter saw. Ensure precise cuts for a seamless fit. If necessary, miter the ends of the profile for corner installations.
Step 4: Insert the Profile
Slide the Gola profile into the mounting brackets. Apply gentle pressure along its length to ensure a secure fit. Adjust the profile as needed to achieve a perfect alignment with the cabinetry.
Step 5: Secure the Profile
Use the provided screws to fix the Gola profile firmly to the mounting brackets. Drive the screws in at an angle to ensure maximum hold. Countersink the screws slightly below the surface for a clean finish.
Step 6: Remove Masking Tape
Once the profile is securely installed, carefully remove the masking tape. Wipe down the area with a clean cloth to remove any debris or residue.
Step 7: Install Doors or Drawers
With the Gola profile in place, proceed to install the doors or drawers. Adjust the hinges or slides according to the manufacturer’s instructions to ensure smooth operation.
By following these detailed steps, you can achieve a professional installation of Gola aluminum profiles that enhance the aesthetics and functionality of your cabinetry. Their sleek and handle-less design will create a modern and minimalist look that complements any interior decor.
-
2024-11-29Top Trends in Modern Kitchen Cabinet Pulls for 2024
-
2024-11-28The Ultimate Guide to Modern Kitchen Cabinet Pulls- Materials, Styles, and Tips
-
2024-11-27Elevate Your Kitchen Design with These Must-Have Modern Cabinet Pulls
-
2024-11-26Sleek and Stylish- The Best Modern Kitchen Cabinet Pulls for a Contemporary Look

