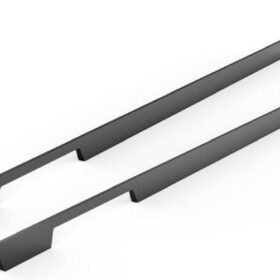
DIY Installation of Concealed Handles in Your Wardrobe
Give your wardrobe a sleek and modern upgrade with concealed handles. These discreet handles offer a seamless and elegant look, making your wardrobe a stylish addition to your room. Installing concealed handles is a DIY project that can be completed with just a few tools and some patience.
Advantages of Concealed Handles
Concealed handles provide numerous advantages, both aesthetic and functional:
Sleek and Modern Design: Concealed handles create a seamless look, blending into the wardrobe’s design without any visible hardware. This results in a minimalist and contemporary aesthetic.
Space-Saving: Unlike traditional protruding handles, concealed handles do not take up any additional space, making them ideal for smaller rooms or closets.
Improved Safety: With no protruding handles, there’s no risk of snagging or tripping, ensuring a safe environment, especially for children.
Easy Cleaning: Concealed handles are flush with the wardrobe’s surface, allowing for easier cleaning and maintenance, preventing dust and dirt from accumulating.
Tools and Materials
To complete this DIY project, you will need the following tools and materials:
Concealed handle kit (includes handles, screws, and a drilling template)
Drill
Screwdriver
Measuring tape
Pencil
Safety glasses
Step-by-Step Installation Guide
Follow these step-by-step instructions to successfully install concealed handles on your wardrobe:
1. Plan and Mark the Handle Positions
Use the drilling template provided in the concealed handle kit to mark the exact locations for the handles.
Ensure that the handles are evenly spaced and aligned properly.
Mark the drill points with a pencil.
2. Drill the Holes
Wear safety glasses for protection.
Using the drill, carefully drill holes at the marked drill points following the instructions in the handle kit.
The depth and diameter of the holes should match the concealed handle specifications.
3. Insert and Secure the Handles
Insert the concealed handles into the drilled holes.
Use the provided screws and a screwdriver to secure the handles tightly.
Ensure that the handles are firmly attached and do not wobble.
4. Clean and Enjoy
Wipe down the wardrobe surface to remove any debris or dust.
Admire your newly transformed wardrobe with its sleek concealed handles.
Tips for Success
Use a sharp drill bit to prevent splintering or tearing of the material.
Be careful not to over-tighten the screws, as this could damage the handles or the wardrobe.
If you have a thin wardrobe, reinforce it from the inside using a piece of wood or plywood to provide support for the handles.
For a more secure installation, consider using wood glue or epoxy to bond the handles to the wardrobe’s surface.
-
2024-11-29Top Trends in Modern Kitchen Cabinet Pulls for 2024
-
2024-11-28The Ultimate Guide to Modern Kitchen Cabinet Pulls- Materials, Styles, and Tips
-
2024-11-27Elevate Your Kitchen Design with These Must-Have Modern Cabinet Pulls
-
2024-11-26Sleek and Stylish- The Best Modern Kitchen Cabinet Pulls for a Contemporary Look


