How to Paint and Finish Kitchen Bar Handles
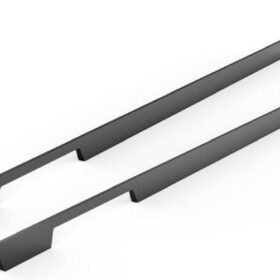
Kitchen bar handles can make a significant impact on the overall look and feel of your kitchen. Whether you’re looking to update the appearance of your existing handles or install new ones, painting is a budget-friendly option that allows you to customize the finish to match your personal style. This comprehensive guide will walk you through every step of the process, from preparation to painting and finishing, ensuring you achieve a professional-looking result.
Preparation
1. Remove Handles: Using a screwdriver, carefully remove the bar handles from your kitchen cabinets or drawers.
2. Clean Handles: Wipe down the handles with a damp cloth to remove any dirt, grease, or debris.
3. Sand Handles (Optional): If the handles have a glossy finish or are in need of refinishing, sand them lightly with a fine-grit sandpaper to create a smooth surface for painting.
Painting
1. Choose a Paint: Select a paint specifically designed for metal surfaces, such as enamel or spray paint. Choose a color that complements your kitchen decor.
2. Apply Primer (Optional): If the handles have a dark or contrasting color, it’s recommended to apply a primer to ensure even coverage.
3. Paint Handles: Using a brush or spray gun, apply thin layers of paint to the handles, allowing each layer to dry completely before applying the next. Apply multiple layers for a more durable finish.
Finishing
1. Clear Coat: Once the paint is dry, apply a clear coat to protect the finish and give it a glossy or matte sheen, depending on your preference.
2. Cure Paint: Allow the paint and clear coat to cure for at least 48 hours before reinstalling the handles to ensure proper adhesion.
3. Reattach Handles: Use the same screws to reattach the handles to your kitchen cabinets or drawers.
Additional Tips
Remove the hardware from the handles to prevent paint from getting into those areas.
Use a small brush to paint the edges and corners of the handles for a precise finish.
If you’re using spray paint, hold the can at a distance of 6-8 inches from the handles and apply even, light strokes.
Paint in a well-ventilated area and wear a mask to protect yourself from fumes.
Allow the handles to dry thoroughly between each step to prevent smudging or peeling.
If you’re painting over existing paint, test the compatibility of the new paint with a small area first to avoid any reactions.
For a more durable finish, consider using a polyurethane or epoxy coating over the clear coat.
-
2024-11-29Top Trends in Modern Kitchen Cabinet Pulls for 2024
-
2024-11-28The Ultimate Guide to Modern Kitchen Cabinet Pulls- Materials, Styles, and Tips
-
2024-11-27Elevate Your Kitchen Design with These Must-Have Modern Cabinet Pulls
-
2024-11-26Sleek and Stylish- The Best Modern Kitchen Cabinet Pulls for a Contemporary Look


